The aim of this article is to detail the standard operating procedure for investors and advisors to self-custody Bitcoin.
- MOBILE/HOT WALLETS
- HARDWARE WALLETS
- MULTISIG WALLETS
MOBILE (HOT WALLETS)
A mobile wallet is the most common, free and easy-to-use type of self-custody wallet. It is also the least secure. However, it should be noted that this does not mean that it is less secure than leaving your coins on an exchange, but it is less secure than a hardware wallet or multisig wallet.
The reason why it is less secure is because it is hosted on a device (mobile or PC) which has access to the internet. As such, the attack surface for hackers, keystroke observing malware and other nefarious software is increased. A mobile wallet is by default far more secure than an exchange, since there is no counterparty risk taken on by the user when keeping his coins on a mobile wallet, providing he backs up his private keys.
Blue Wallet is our top recommended mobile wallet.
This wallet works on both Android and iOS mobile devices as well as a desktop version of Mac’s.
It has a great user interface. Offers Bitcoin, Lightning and Multisig wallets.
Samourai
This wallet works only on Android devices. It includes Whirlpool, a coin-mixing service which is great for advanced users as they can delink their identity from their coins.
Blockstream Green Wallet
This wallet works on both Android and iOS devices and a desktop version for both Mac and Windows is available.
This wallet is by default a 2 of 2 multi-sig, offering additional security out of the box. It incorporates Google Authenticator for a second signing key, meaning that if access to your wallet is gained, a second security check exists to stop non-authorized users from sending Bitcoin out of the wallet.
How to set up a Mobile Wallet – Blue Wallet
(Steps 1 – 5)
1.Download the wallet to your mobile phone
Download a desktop version if preferable, but first download the mobile version and then pair the desktop version, using the 12 or 24 word recovery key recorded in (2). A paired wallet is essentially a clone of the first wallet and has the exact same rights as the first wallet. As such it can move Bitcoin and should thus be kept secure.
2.Write down your 12 or 24 word recovery key (Private Keys) on a piece of paper.
NEVER keep this on the internet, as this provides direct access to your Bitcoin. The purpose of these words are to serve as a backup for your wallet, should you lose your phone or delete the wallet. These 12 or 24 words can be entered into a new wallet to restore your old wallet, giving you access to all of the Bitcoin on it.
For additional security, this backup phrase can be etched onto a steel plate. This makes your backup phrase essentially indestructible, meaning it can survive a fire or other physical damage.
3.Create a pin/password for your wallet.
This provides security to access your wallet on your device, so that if your device were to be stolen, your Bitcoin wallet cannot be accessed.
4.Your mobile wallet is now setup and ready to receive Bitcoin.
5.Receiving Bitcoin:
- Open your Bitcoin wallet
- Select “Receive”
- Copy your wallet address and paste this is as the receiving address to others that will transfer you Bitcoin – for example on your Bitvice dashboard.
For Bitvice customers, this is the address that you should add as “Your Bitcoin Address” linked to your profile, if you wish to receive your Bitcoin that you purchase through Bitvice, to this address.
HARDWARE WALLETS
A hardware wallet is a physical device that looks something similar to a flash drive. It is a more secure way to store your Bitcoin than a mobile wallet, as it is only very briefly in contact with the internet when sending a transaction, if at all.
This means that it is far harder to hack than a mobile wallet and as such should be used for storing larger amounts of value than a mobile wallet. Typically, values of greater than R50k should be held on a hardware wallet, rather than a mobile wallet.
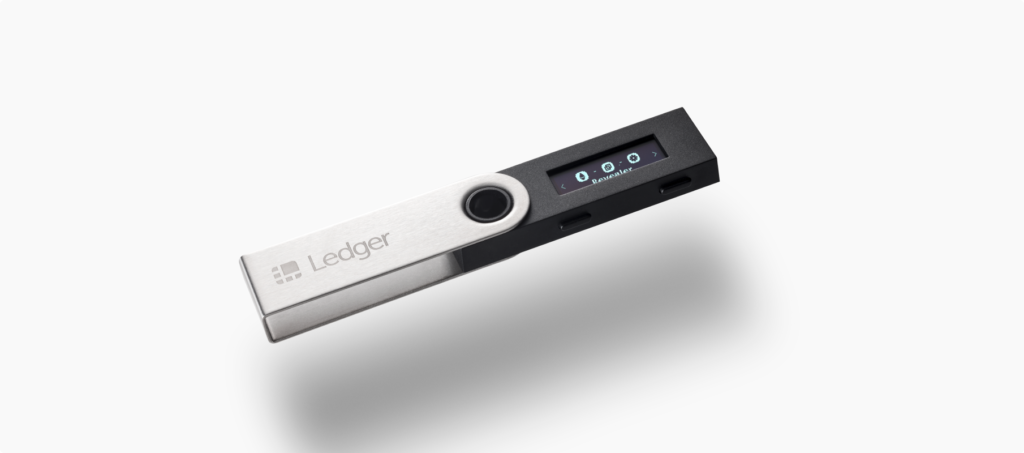
Ledger Nano S
This is the most entry level wallet from Ledger.com.
It does the trick but cannot be used in certain multisig setups, such as the Blue Wallet Vault.
Ledger Nano X
A more advanced hardware wallet, which has Bluetooth capability, meaning you can sync it with a mobile phone which allows for a better user experience.
Coldcard
The gold standard in hardware wallets. Completely open source code and hardware schematics means that many sets of eyes are constantly looking at the code and design, constantly improving the security model. You don’t get a better hardware wallet than this, however you will have to import it from Canada, which is a bit of a pain.
How to set up a Hardware Wallet – Ledger Nano S
(Steps 1 – 3)
- Follow the instructions from the manufacturer, these will come with the device.
- Write down your private key (24 words) on a piece of paper and store this securely in a DIFFERENT physical location to the hardware wallet. The reason for this is because if the location where you keep your hardware wallet burns down, is destroyed by a fire/flood or robbed, you can always restore your wallet from your private key. If they are stored in the same location and both destroyed, your Bitcoin will be lost forever.
- A better alternative to keeping your private key on a piece of paper is engraving it on a metal plate. This cannot be destroyed by fire.
- Create a Bitcoin wallet and submit this address to Bitvice as your receiving Bitcoin address. We will transfer your purchased coins to this address.
Types of Hardware Wallet Setups
- A single hardware wallet (above)
- Multiple hardware wallets (not held in a multisig chorum)
Main and decoy setup
This setup utilizes two hardware wallets. The first wallet is a decoy, which contains a small amount of Bitcoin (less than 5% of your total stack) while the second contains the balance and majority of your Bitcoin. This can provide plausible deniability in the event of a physical attack on your person, while keeping your main balance safe. This setup lets you prioritize the physical security of one device, while placing the decoy device on a lower security level. For example, your primary device is kept in a bank vault, while the decoy device is kept in your home for quick and easy access. This setup will protect you from physical attack (5 dollar wrench attack)
Clone setup
This setup creates a simple clone of your hardware wallet across two or more hardware devices. This is a great way to provide yourself with redundancy in the event of one of your devices failing. However, it also requires maintaining identical security for two or more devices, as if somebody gains access to one of the devices, your entire Bitcoin stack is at risk. This setup works well if the physical security of the device and private keys can be guaranteed, such as keeping them in a private bank vault. The utility that this setup provides is if two parties (husband and wife) both require primary access to the funds held on the wallet.
MULTISIG WALLETS
A multisig wallet is a collection of single key wallets combined together to form a single address output. However, for any transaction to be moved out of the multisig wallet, a certain chorum of the keys used to create the wallet must sign the transaction. For example, in a 2 of 3 multisig, a total of 3 keys are used to create the wallet and any 2 are needed to sign the transaction in order to broadcast it to the network. This means that 1 key can be redundant in this setup, allowing the user to have the peace of mind of knowing that if he loses one key, the other 2 can still sign a transaction and thus the Bitcoin held in the multisig is still accessible. Other multisig setups can include a 2 of 2, 3 of 5, 5 of 7, 7 of 9 etc. Thus a custom multisig setup can be built for any security requirement.
For instance, a company holds Bitcoin on their balance sheet and decides to make use of a multisig wallet for this purpose. They do not wish to rely on a single point of failure such as if they were to have all of their Bitcoin on one hardware wallet. They require that the CEO, CFO and Chairman of the board should be responsible for storing the keys to their multisig, so they make use of a 2 of 3 multisig wallet.
Thus each of the 3 hold a hardware wallet, but only 2 are required to sign for any transaction. If any one of them decide to try to steal the funds they are prevented by the fact that they only control 1 key each, and 2 are required to move any Bitcoin out of the multisig wallet.
Multisig Coordinators
Multisig wallets make use of software to coordinate the hardware wallets involved in the transaction. This software creates the multisig and is responsible for coordinating the hardware wallet keys when a transaction has been sent.Like a hardware wallet, a multisig has a wallet coordination file which must be kept as well as the private keys of each hardware wallet which has been added to the multisig. This wallet coordination file is essentially a map which tells the software which hardware wallet addresses make up the multisig. This must be kept safe. Either as a text file or an animated gif of a QR code. The best way to store this file is on a flash drive with a paper backup copy of the text file.
Easy Multisig Setup – Casa App (Ready-to-use)

Casa Multisig (recommended)
Keys.Casa is a ready-to-use Multisig provider app that can be downloaded to your mobile device (Android or iOS).
It is around R2,000 per annum for the recommended Gold plan. If you are holding more than R100,000 in Bitcoin then this plan is certainly worth its money.
All you need to do is have a hardware device, a mobile and the Casa app.
Casa guides you through the setup process here.
If you wish to setup your own free multisig coordination, continue to the next page.
Other Recommended Multisig Coordinators (free to setup)

Sparrow Wallet
This is a another free and great multisig platform to use, but is a bit technical – thus reserved for the Bitcoin user who knows what he is doing. It is a desktop application which is run locally on a laptop or PC. The wallet allows for users to sign with their keys remotely, meaning that the participants of the multisig do not have to be in the same geographical location or using the same computer when signing a transaction. Sparrow supports most hardware wallets, including the older Ledger Nano S, which is the most popular and affordable hardware wallet available. Sparrow also supports the more secure PSBT (Partially signed Bitcoin transaction) enabled hardware wallets, such as the ColdCard or Cobovault.
How to video

Blue Wallet
This is the most user friendly free multisig wallet. However, it only supports hardware wallets that make use of PSBT (Partially signed Bitcoin transaction)s (partially signed Bitcoin transaction). This means that older hardware wallets such as the Ledger Nano S and Trezor One/Model T are not supported. Make use of ColdCard, Cobovault or any other PSBT enabled hardware wallet for setting up this multisig wallet. Blue Wallet can be downloaded as a desktop app for Mac only currently, or run on iOS or Android mobile devices.
How to video

Caravan
Caravan is free to use. Unlike the other multisig applications, Caravan exists as a website, rather than an application which runs locally on your device or PC. It is very easy to use and can connect to most hardware wallets, including the Ledger Nano S.
This is an open-source project that is run by a well-trusted and renowned company called Unchained Capital. As it is open-source and MIT-licensed, it is not dependent on the company.
It is a fairly advanced setup process and should be approached with caution when setting-up a multisig wallet for long-term use.
How to set up a Multisig Wallet – Sparrow Multisig (2 of 3 setup)
This is the most common setup for an individual who is looking to secure a medium to
large amount of value (>R100k). The simplest way to do it is the following:
Video Guide using Sparrow Wallet
(Steps 1 – 5)
- Purchase 3x Ledger Nano S and have them shipped to you/your client if you are assisting a client with this set up.
- Set up each of the 3 hardware wallets, following this guide. Be sure to write down the private key (24 words) of each hardware wallet and store them safely, in a different location to the devices.
- Download and install Sparrow Wallet on your/your client’s PC.
- Follow the setup guide on the Sparrow Website.
5. Steps for creating a 2 of 3 multisig wallet in Sparrow:
- Click File/new wallet
- Select Settings on the left side tab
- Select the drop-down menu Policy Type: choose Multi signature
- Cosigners bar: select 2 and 3 (M of N should state: 2/3)
- Script Type: Leave as default (Native Segwit (P2WSH))
- Script Policy: Leave as default
- Keystores: These are a list of the keys (hardware devices) that you will be using to create the multi signature wallet. For Ledger Nano S, select the option Connected Hardware Wallet.
- Connect your hardware wallet and click Scan.
- Your wallet should show up (Ledger Nano S) with a drop-down menu next to it. Click Import Keystore.
- Change the label on Keystore 1 to something that makes sense to you, Eg. Hardware Wallet 001 (Ledger Nano S).
- Repeat for Keystores 2 and 3.
Exporting Wallet Config File
The last step is to export your Wallet config file. This is an essential file and should be saved on a flash drive and kept with your hardware wallet(s). You will use this file if you need to access your funds on Sparrow wallet that had to be reinstalled on a new PC. Eg. Your PC got stolen and you need to restore your wallet.
This file can then be imported into Sparrow to reload all the information relating to the keystores and multisig. Click File/export wallet. Save this file. You can also use this file if you are signing the multisig transaction on different devices and need to coordinate signing. Eg. You and your wife need to both sign using your hardware devices to move funds out of the multisig, but are in geographically separate locations and can’t use the same PC. Thus you both download and run Sparrow wallet and import the config file to ensure you are both working from the same multisig wallet, then proceed with the signing process with the different keys.
Signing the transaction on different machines
This is the final part of sending a transaction, when 2 of the 3 keys must sign the transaction in order to broadcast it across the Bitcoin network (pay somebody). The first key initiates the transaction and signs it by connecting the hardware wallet and following the prompts. When complete, the PSBT (Partially signed Bitcoin transaction) file must be exported and sent to the 2nd signing party.
This file is imported into Sparrow (after opening the correct multisig wallet using the earlier mentioned Wallet config file). This will trigger the request for a second key to sign, connect the next hardware wallet and sign the transaction. Once complete, broadcast the transaction to the network.
Contact Bitvice at:
1. On the contact form on www.bitvice.io with your question/s
2. Or email us at support@bitvice.io if you have any question/s


Very nice overview of crypto wallets. Thanks!
Hi would you mind sharing which blog platform
you’re working with? I’m planning to start my own blog
soon but I’m having a hard time deciding between BlogEngine/Wordpress/B2evolution and Drupal.
The reason I ask is because your layout seems different then most blogs and I’m looking for something completely unique.
P.S Apologies for being off-topic but I had to ask!